It is a place where you store your WordPress blog. Specifically, it is a server (computer) that can be accessed globally (with WordPress installed on it). Hosting companies ensure the server is lighting fast & optimized to serve your WordPress blog traffic 24/7. You can then access your blog via a URL (web address) by typing it into a web browser (e.g., https://igorjovanovic.com).
How much does it cost?
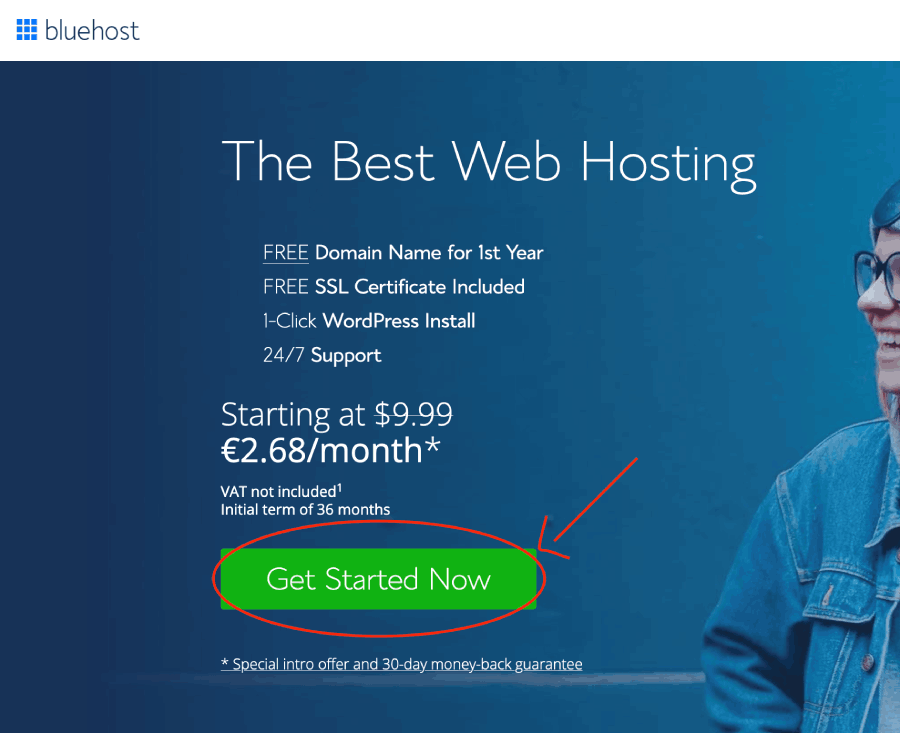
BlueHost offers reliable hosting packages starting at $3 a month. Depending on how secure you want your blog to be, it can go up to $7 a month.
What is the best web hosting?
I have tried many different hostings for my own projects and for my customers. The best value for money is offered by BlueHost. It’s relatively cheap, secure, and yet very reliable (+ they offer great support). 9/10 times I use this hosting as it proved its value multiple times over the years. (that 1 out of 10 is when I am building large-scale mobile apps that use different hosting solutions.)
Are there free alternatives?
Yes, you can host a free blog at WordPress.Com. Since it is free, there are very strict limitations. Some restrictions: you CAN’T install plugins, you CAN’T customize the theme fully, you CAN’T add ads to your blog (to earn money), you CAN’T add shop functionalities (there is more)… So, the blog is not truly yours… I do not recommend the free alternative if you are serious about starting a blog. Simply because the free alternatives are not truly free — when your blog starts growing you will pay dearly for additional features/storage (upgrade can cost up to $500 per year). This post is focused on a self-hosted WordPress blog (where you are behind the driving wheel and have 100% control).
The web hosting I personally use is Bluehost. Over the years, I created hundreds of WordPress websites with Bluehost (a sort of a battle-tested solution for me).
Bluehost is also one of the most established & largest companies in the hosting industry — founded in 2003.
If you choose something else, remember that your web hosting must be secure enough (against attackers). Also, make no compromise with the blog speed and availability (no use of web hosting with frequent service failures).
Since Bluehost completes all the checkboxes (while being officially recognized by WordPress), I will show you how to open an account there.
Notice: Since I am based in Europe, my snapshots might be slightly different than what you see — e.g., the prices are expressed in Euros (€) here, and you will see Dollars ($), of course.
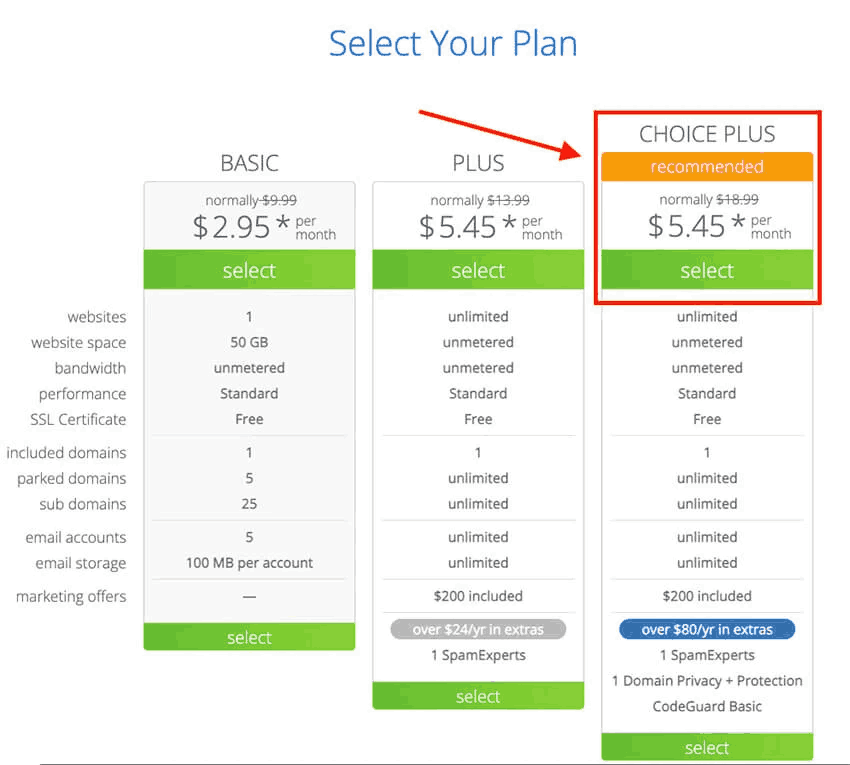
What is the best hosting plan for you?
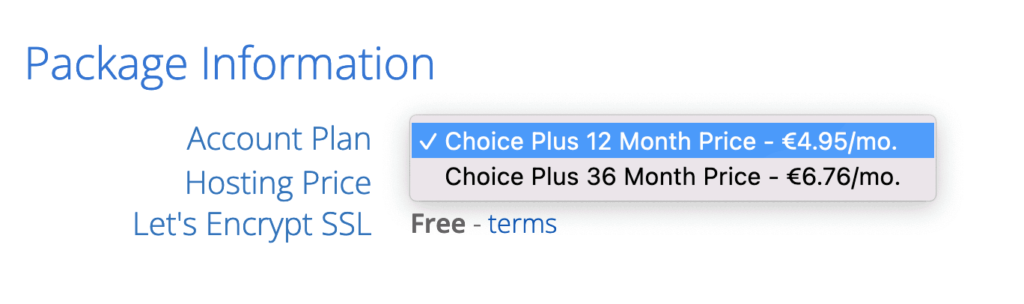
I recommend selecting the officially recommended plan called “Choice Plus.”
With this plan, you do not have to worry about additional memory and migration to a different plan as your blog grows. There is enough storage even if you want to add many high-definition media to your blog posts.
That’s not all — you get the full protection of your private data — your name, email, and home address will not be available online (not every host company offers this protection).
The reality is any plan will do. The “Choice Plus” package is my preference. If the price concerns you, select the “Plus” or the “Basic” plan to feel more comfortable.
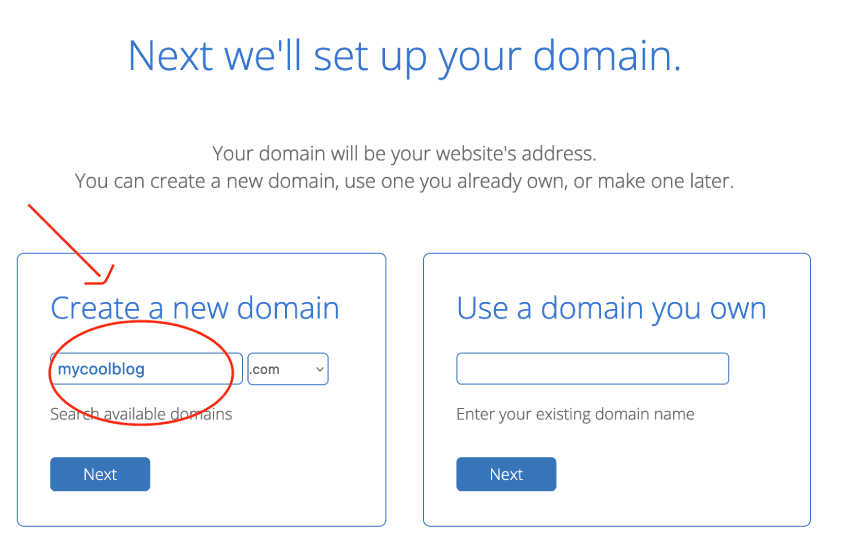
Choose the domain name for your blog
Now select the domain name that others will use to access your blog. (I recommend selecting a .COM domain, but it is fine if you use any other extension, e.g., .INFO or similar.)
If unsure, you can always click “I’ll create my domain name later” at the bottom of the screen. (Your free domain by Bluehost will be waiting for you — so you are not losing anything.)
To skip the domain name step for now, click on the text similar to this (at the bottom of the page):
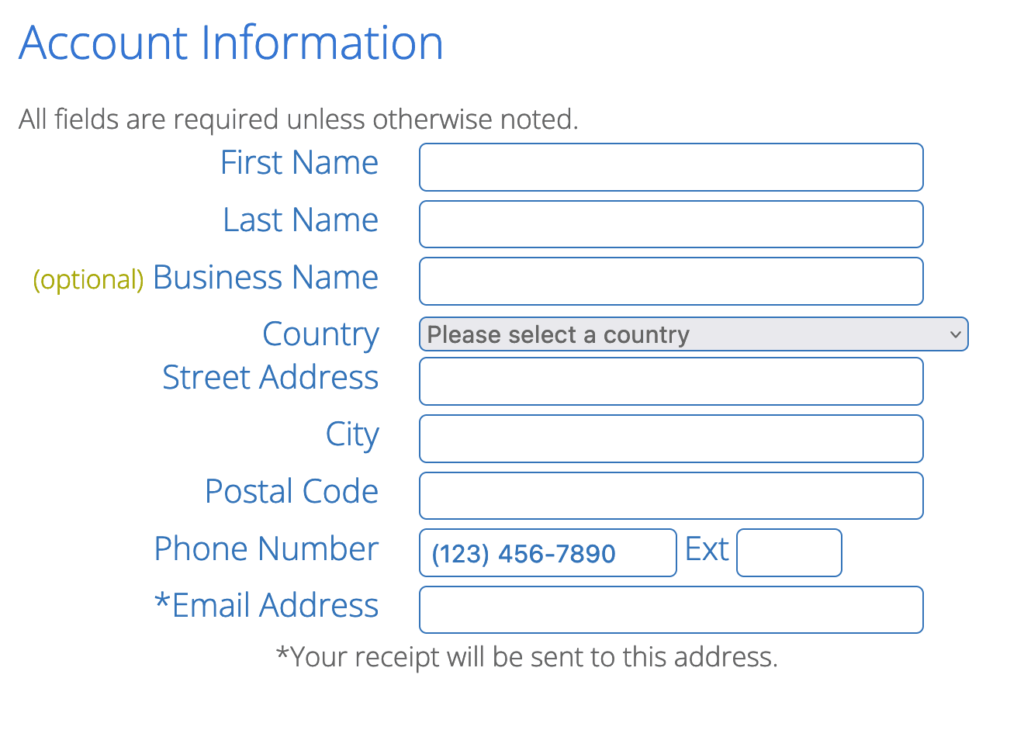
Register an account (almost done!)
Fill in your personal details (pretty much a standard sign-up form as everywhere else).
Now you have to choose a term for the selected plan. This basically means how much in advance you want to pay for the hosting service.
Most hosting companies, Bluehost included, do not offer monthly payments. The industry standard is to pay for one or more years in advance.
Depending on your location, you will have 1,2,3 or 5 years as an option. (More years you pay in advance, the bigger the discount.)
I personally always take the 3-year option for my clients since this leaves enough time for the blog to mature and develop (and does not put any pressure).
Also, the savings are considerable, and you lock the price for years to come (especially important when prices are increasing globally).
You may choose the term that suits you the best. (Note the term options can be named differently, depending on your location.)
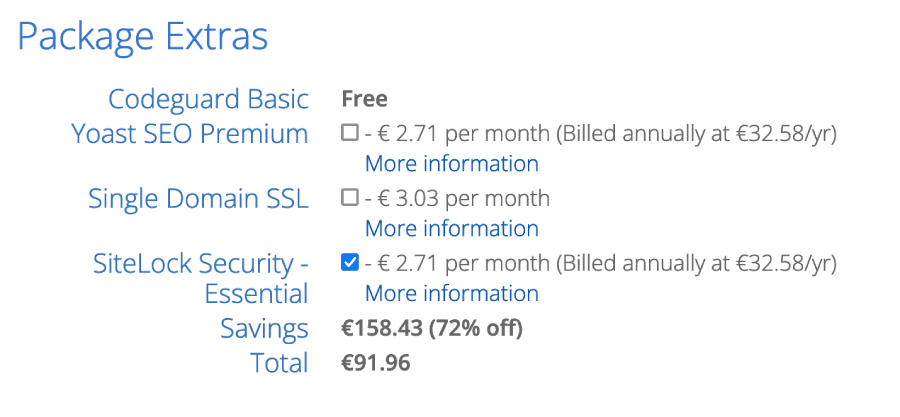
In the package extras section, you may select some additional options. At this point, you can uncheck everything. Eventually, you may leave the “SiteLock Security” option on, but you do not have to — Bluehost is secure enough even without that.
(Saving is always good when not compromising security or other critical factors…)
The total shows what you pay for the service (for the entire period you selected). (No more costs since everything else is free of charge.)
NOTE: Bluehost offers a 30-day no-ask money-back policy. If anything unplanned happens, you can always get your money back — zero risk.
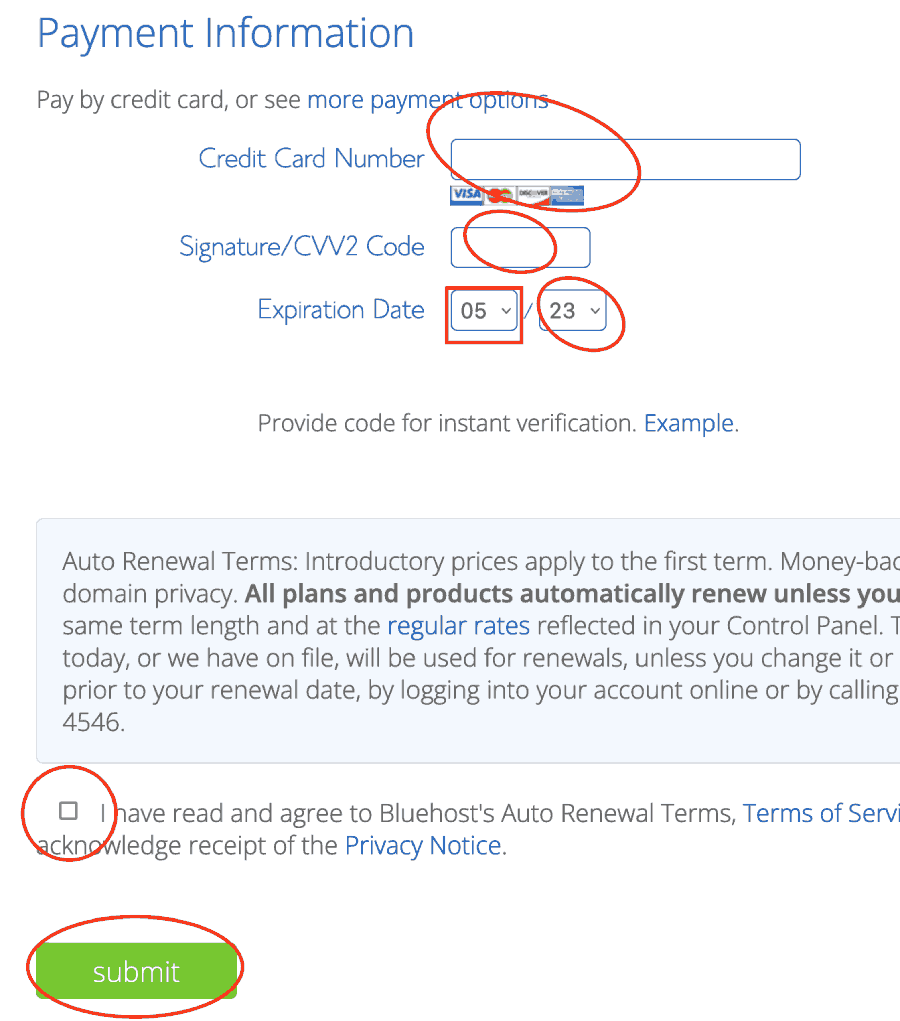
The last step before the world can see your blog… Fill in the billing details, check the “Terms of Service” checkbox, and click the green “Submit” button, as shown below.
Congratulations!
It’s a historical moment for you. Once your blog grows into a full-scale business, you will celebrate today’s date as an anniversary.
(I do celebrate the date when I purchased my blog domain name — but the .INFO version — igorjovanovic.info — since it was the first domain I owned).
Take a moment to celebrate (with a glass of your favorite drink) and then go to the next section (for some more good things…).
Here is the video of the exact steps to create an account at Bluehost.
How to get started with Bluehost & WordPress in 2 minutes
Disclosure: When you register an account with Bluehost through the links in the post, my website can earn a commission. This keeps the guide free of charge and open to everyone (yet, writing good content takes a lot of time). Rest assured that I only recommend what I personally use & what was battle-tested with many hundreds of my customers & my private projects (proven solution).
How to install WordPress (start the website)
Only a few more clicks and your blog will see the daylight for the first time.
(If you prefer to watch videos, here is the video that shows how to finalize the configuration. If you prefer to read, follow the text further — the result is the same.)
Configure WordPress in Bluehost
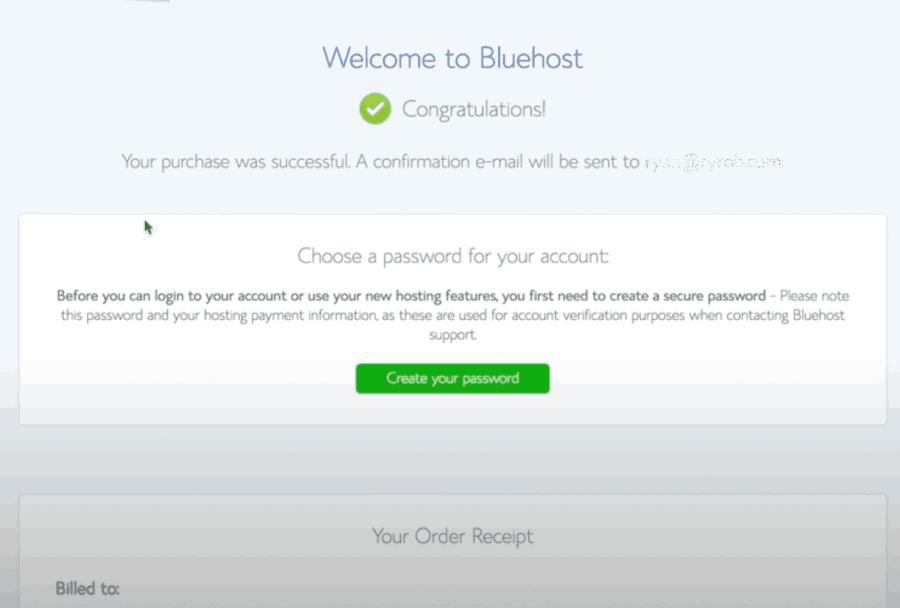
Once you complete the payment, this is the page you will see (at the bottom, there is also a payment receipt in case you need it).
Go ahead and confirm your email first — open your mailbox and click the link from the email Bluehost sent you. That’s it; your account is fully activated now.
The screen you will land on (after confirming the email) looks similar to this.
You do not have to do anything in that tab but keep it open (we will use it later).
Navigate to the tab with the welcome message from Bluehost (that has the green “Create your password” button).
Click the green “Create your password” button to create your Bluehost password (you will use this password + your email to log in to the Bluehost account or to request support).
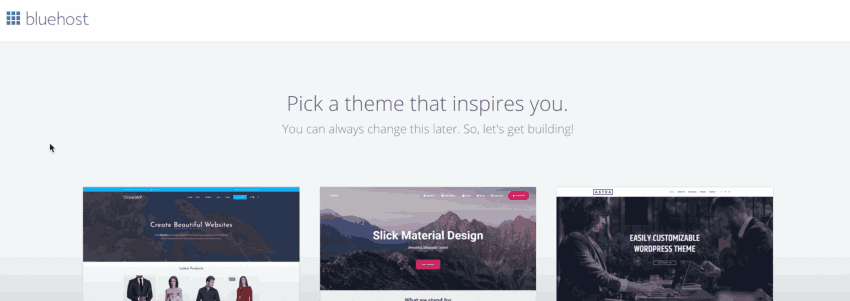
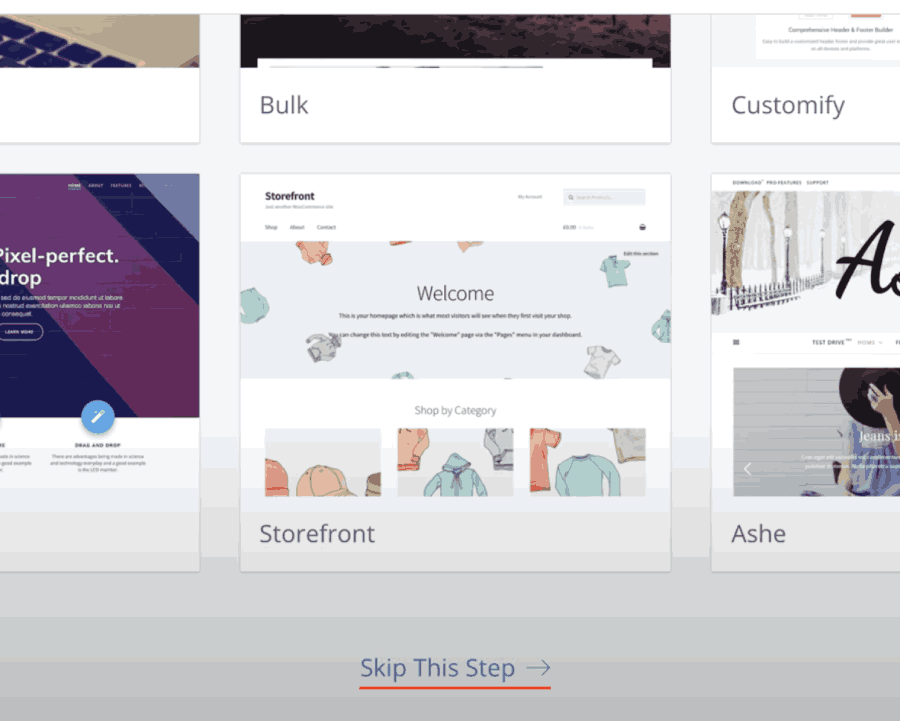
After you have set up the password, return to the tab that asks you to “Pick a theme” and scroll down to the bottom of that page. There, you hit the “Skip This Step” button, as shown below.
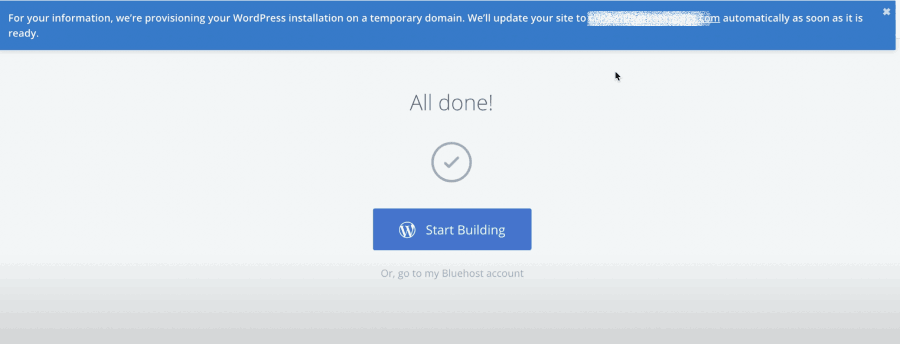
Bluehost will now install WordPress for you… Relax for a few moments until your blog is ready (it takes 1-2 minutes at most).
Once everything is done, here is the screen you will see.
If you have selected the domain name while setting up the account, you will see a notification at the top of the page.
This basically means that Bluehost will give you a temporary domain so that you can get started immediately. (You will notice a strange URL address once you reach the WordPress Admin panel).
So, the domain name will not be the same as the one you selected. Nothing to worry about — once your selected domain gets ready, Bluehost will automatically connect it to your WordPress website.
This usually lasts up to a few hours. You can normally use your WordPress blog in the meanwhile and continue with the customizations.
Click the blue “Start Building” button to see the magic.
Welcome to your WordPress Admin Panel
The page you see now is your WordPress Admin panel. Only you can access this page, and you will manage the entire blog from here (never share this page with anyone and keep it top secret).
What is an admin in general?
Admin stands for an administrator. It is the most powerful user that can access any part of the system. There are no limitations to this account, and it should be used cautiously (and never shared with others). Why? Because the account has the power to destroy everything. (WordPress is no exception.)
What is WordPress Admin panel?
Your blog has two sides — one for your visitors (public) and the other for you (the administrator) which is private. From the admin panel, you (the administrator) edit the website and add posts. Actually, much more than that (you will learn more about it in the next steps). Admin Panel is only for your eyes and no one else can access it.
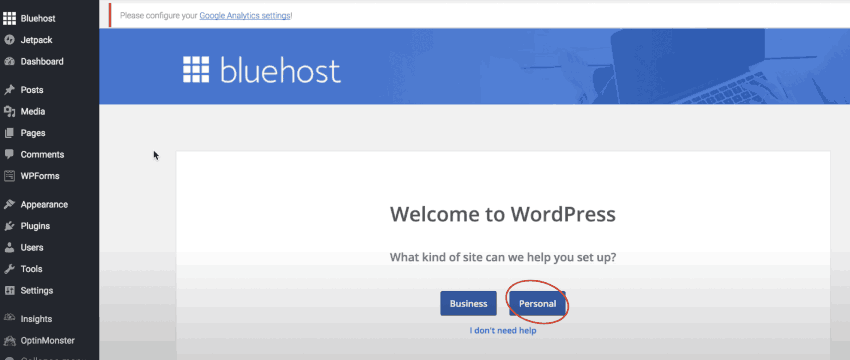
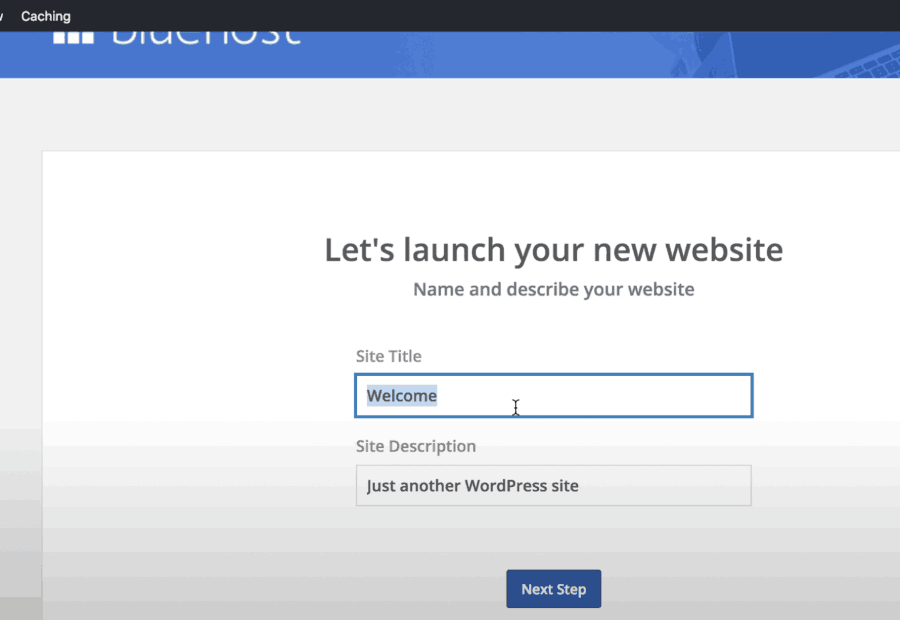
A few last steps to finalize the configuration… Select either “Personal” or “Business” to go to the next page (I usually always select “Personal” — it makes no difference).
Now you have to fill in your blog title and the description. Keep it short and to the point (mine is IgorJovanovic.Com [title] — IT professional with 15+ years of experience [description]).
You can change both at any point. Hit “Next Step.”
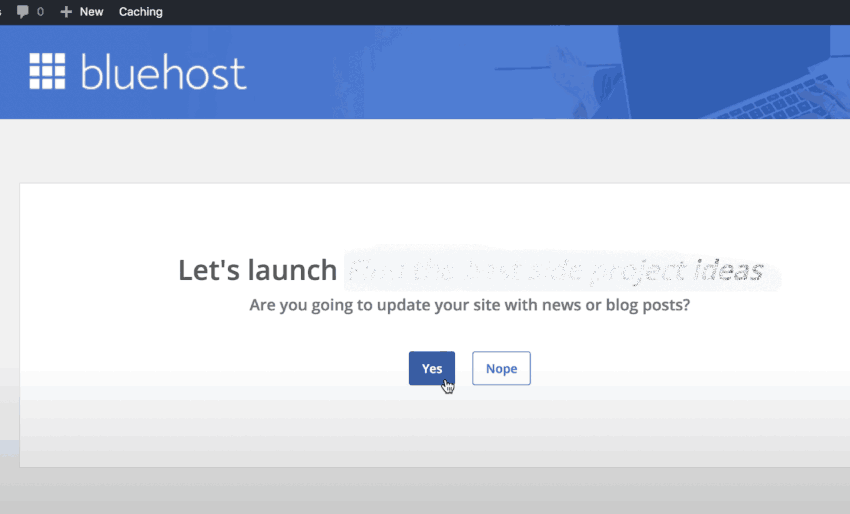
On the next page, WordPress is getting ready to finalize the configuration. Click the blue “Yes” button to respond positively to the question (since you will indeed write posts and update the blog).
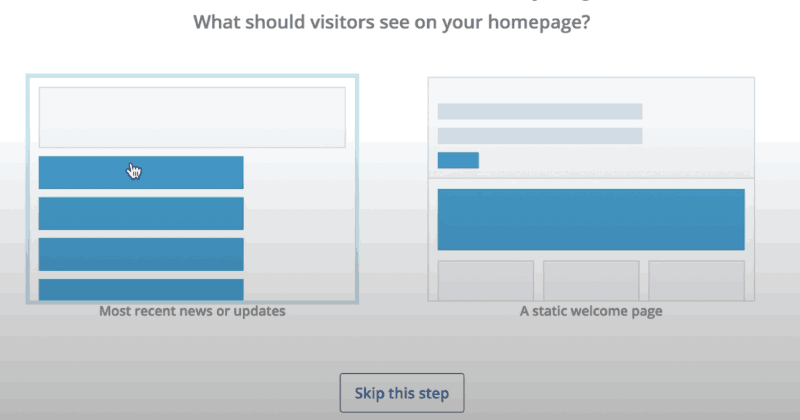
Next, select the left-hand-side box to list your latest posts (news/updates) on the home page, as shown below.
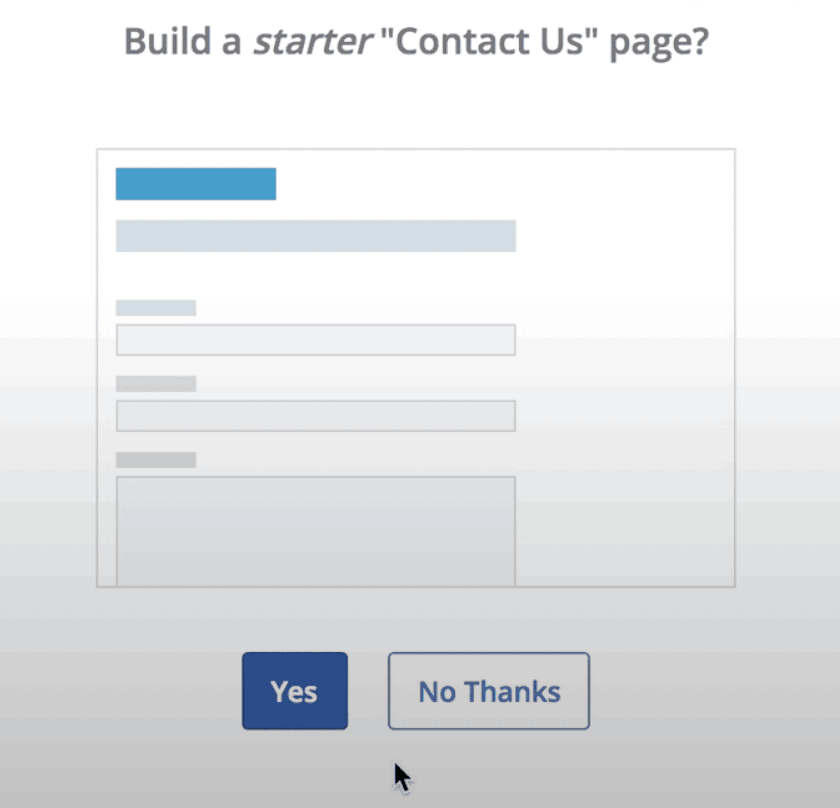
Now click “Yes” to automatically allow WordPress to create a contact page.
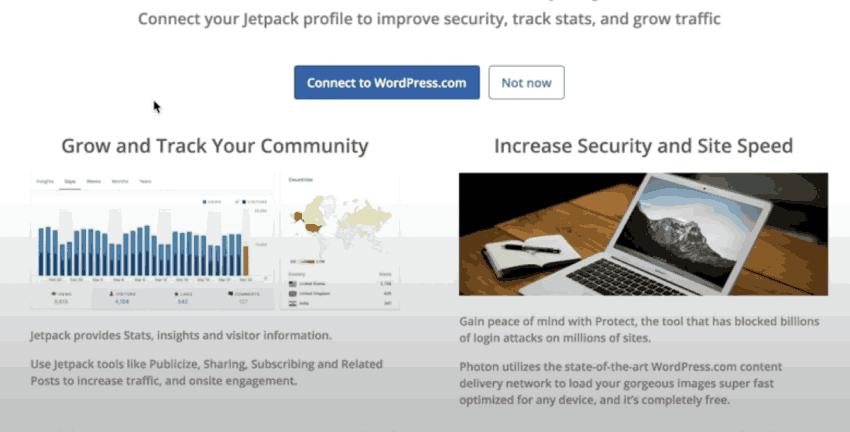
On the next screen, click “Not Now” to skip the step with Jetpack setup since you do not need it right now.
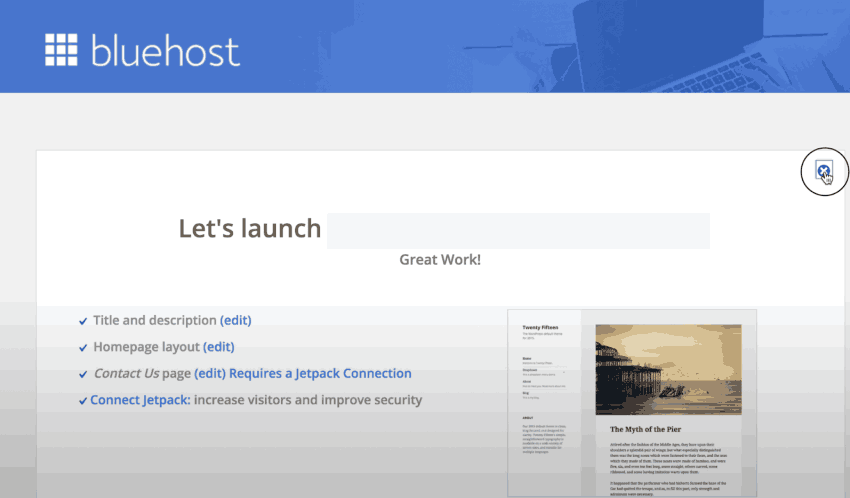
That’s it — you are all set. Click the right-hand-side x button, as shown here, to finalize the setup.
How to log in to Bluehost and WordPress Admin?
There are two easy ways to access your WordPress website.
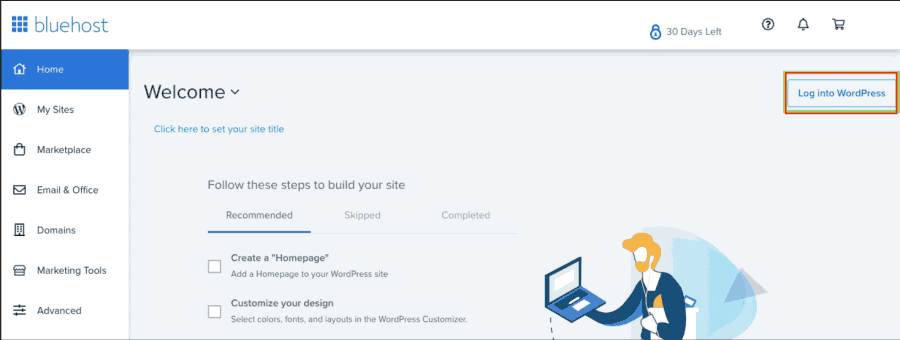
The first is through Bluehost. To log in, follow this link and enter the email and password (you created this password a few steps back, remember?).
Once inside, in the Home section of Bluehost, you will see “Log into WordPress” as below. Click that button to log in to your WordPress blog.
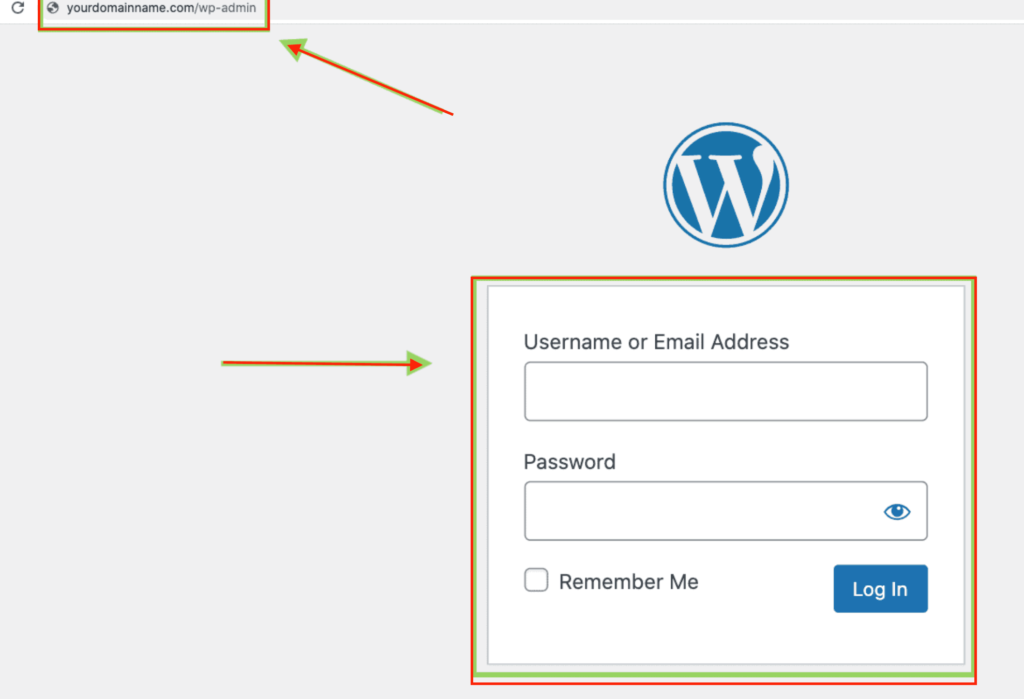
Alternatively, you can go directly to your domain name and add /wp-admin at the end of the address. For example, here is the admin panel address for yourdomain.com.
https://yourdomain.com/wp-admin
(Make sure you replace yourdomain.com with your actual domain name.)
This will lead you to the login page. Enter your email and password to log in. Look below.
Congratulations, your blog is now officially set up and ready.
Experienced tech professional with a strong track record in web services and fintech. Collaborating with Silicon Valley's multi-billion tech giants and offering a range of services committed to excellence. Check the Services page for how I can help you too.


")
![How To Choose The Best Programming Language To Learn For Beginners [Programmer’s Guide]](data:image/svg+xml,%3Csvg%20xmlns='http://www.w3.org/2000/svg'%20viewBox='0%200%20150%20150'%3E%3C/svg%3E "How To Choose The Best Programming Language To Learn For Beginners [Programmer’s Guide]")
")
")
![How To Choose The Best Programming Language To Learn For Beginners [Programmer’s Guide]](https://igorjovanovic.com/wp-content/uploads/2022/10/front_office_department-300x197.png "How To Choose The Best Programming Language To Learn For Beginners [Programmer’s Guide]")
")


