
Are you still managing your stack manually? What if I told you that you could stop doing all that repetitive work right now? And yes, you can have half of your time back for more productive activities. But who is going to do it, then? Well, here is the thing…
Gone are the days when repetitive work was appreciated. If a task can be broken up into predictable activities, you should automate it. Period.
I’ve seen many engineers who resisted the change for too long and kept doing things manually over the years…
(And you can guess how this ends in today’s era of automation…)
The point is the sooner you get on this train, the better for you and for your career.
Let me show you one dead-simple way to start automating your tech stack.
Here is how you can use Terraform to manage your databases automatically.
(Since Redis DB is straightforward to start with, I will use it throughout the post.)
What is Terraform?
It’s an infrastructure as a code solution (and it’s open-source — FREE).
But what does this mean exactly?
Well, you can write a “recipe” that references all the resources (ingredients) that your application requires.
Then you simply send it for “execution,” and the resources will be up and running in seconds.
So, you write the instructions in a Terraform template (.tf file), and then this “playbook” contacts the third-party providers and starts creating the resources (be it a database, a subscription, a VM/VPC, or anything else).
(Almost all cloud technologies offer Terraform integration, including Amazon Web Services, Cloudflare, Microsoft Azure, IBM Cloud, Serverspace, Google Cloud Platform [GCP], Redis Cloud, DigitalOcean, Oracle Cloud Infrastructure, Yandex Cloud, VMware, and others.)
Automation prerequisites
There are a few things that you must have in place so that automation actually works.
(Don’t worry, this post covers each step.)
- Install Terraform on your computer.
- Create Redis Cloud Account (free tier is available).
- Generate the Redis Cloud API keys.
- Make Terraform template (the
.tffile). - Start working with Terraform & Redis Cloud.
Note that all the commands in the article are meant to be executed in MacOS.
But what if you are using Linux/Windows?
Simply follow the links to the equivalent commands for Linux/Windows throughout the post.
Ready to start?
Let’s go.
#1 Install Terraform
This step is easy. You have to install Terraform itself.
The fastest way to do this on MacOS is through the Homebrew package manager.
(If you are using Windows or Linux, click here to follow the instructions straight from Terraform.)
In case you don’t have Homebrew, here is the command you need to execute in your terminal to install it (or head over to their website to copy the most recent command form there).
/bin/bash -c "$(curl -fsSL https://raw.githubusercontent.com/Homebrew/install/HEAD/install.sh)"Code language: JavaScript (javascript)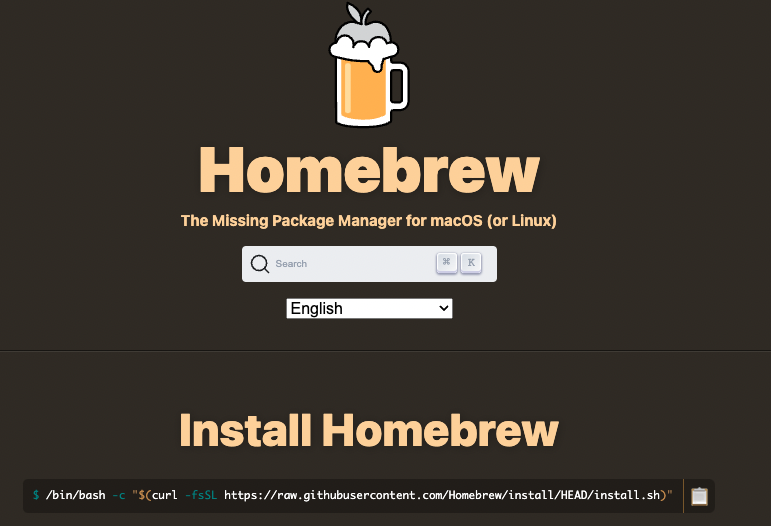
After the installer has finished, paste the following into your terminal to add homebrew to your PATH (so that you can call it from wherever you want).
PATH=/opt/homebrew/bin:$PATHCode language: JavaScript (javascript)But what if you already have Homebrew installed?
Well, it’s a good practice to update Homebrew before proceeding. Execute this command.
brew update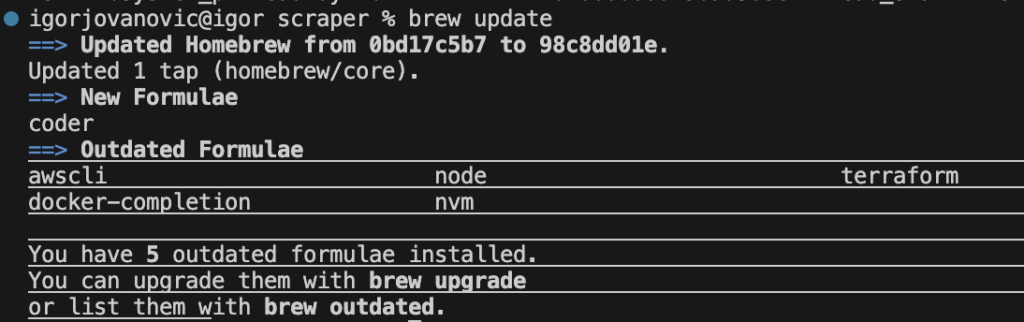
Good job.
Now you can test if Homebrew is running by executing the following into your terminal.
brew(If you get the “command not found” error, head over to this troubleshooting article that covers the error from all angles.)
That’s it… Now you are going to do the real thing…
I’ll show you how to install Terraform.
(Thanks to Homebrew, this is now a walk in the park.)
Paste the following commands into your terminal to install Terraform.
brew tap hashicorp/tapAnd then
brew install hashicorp/tap/terraform(Note: You must follow instructions from here to install Terraform on Windows or Linux.)
Regardless of the operating system, you should be done within a few minutes…
That was easy, right?
Your Terraform is now ready, and you can start automating everything.
#2 Create your project
Here is where things get good for you…
Let’s now automate tasks of provisioning resources at a provider.
The provider I will be using here is Redis Cloud (DBaaS — database as a service).
There I am going to create some subscriptions and databases via Terraform automatically.
If you want to follow along, go ahead and create an account at Redis Cloud by clicking here.
Once you learn how to do it, you can use any other service provider to automate the tasks via Terraform (AWS or GCP, for instance).
At this point, you must have an account with your provider to follow along.
But wait, how does Terraform actually “talks” to the provider?
API Keys
Terraform uses the API keys that you generate at the provider.
These keys serve as an authentication method so that Terraform can actually “unlock the door” of your provider and create the resources.
Click here to see how you can create API keys at Redis Cloud so that you can follow along.
This process takes seconds, and you should have two API keys at the end.
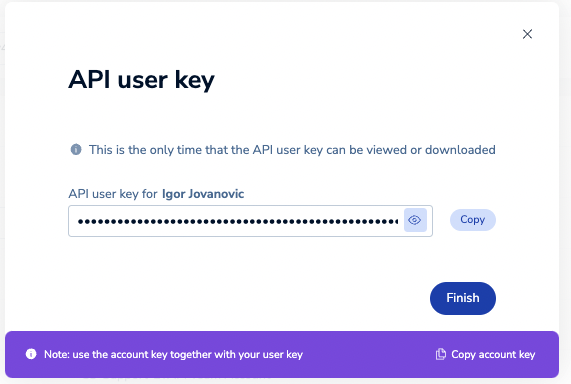
PUBLIC KEY (a.k.a. account access key)
PRIVATE KEY (a.k.a. user key)Code language: CSS (css)
What is important now is to “write” those API keys to your environment variables so that Terraform can grab them.
How do you do that?
Very simple; just execute the below commands in your terminal (make sure to replace <public-account-key> and <user-secret-key> with your actual keys.
export REDISCLOUD_ACCESS_KEY=<span style="background-color: initial; font-size: inherit; text-wrap: wrap; color: inherit; letter-spacing: -0.015em;"><public-account-key></span>
export REDISCLOUD_SECRET_KEY=<user-secret-key>Code language: HTML, XML (xml)
Note: The commands will set the API Keys only temporarily until you close the terminal (for permanent setting, check out this article).
The MacOS commands will also work fine for Linux (but just in case, here is a full article on setting the environment variables on Linux).
And if you come from Windows, here is how you can do it there.
Here comes the bread and butter of this post…
Your project’s folder
Create a folder to store the Terraform files (templates) on your computer.
Here is how it looks on my machine (don’t worry about the files for now — yours should be empty).
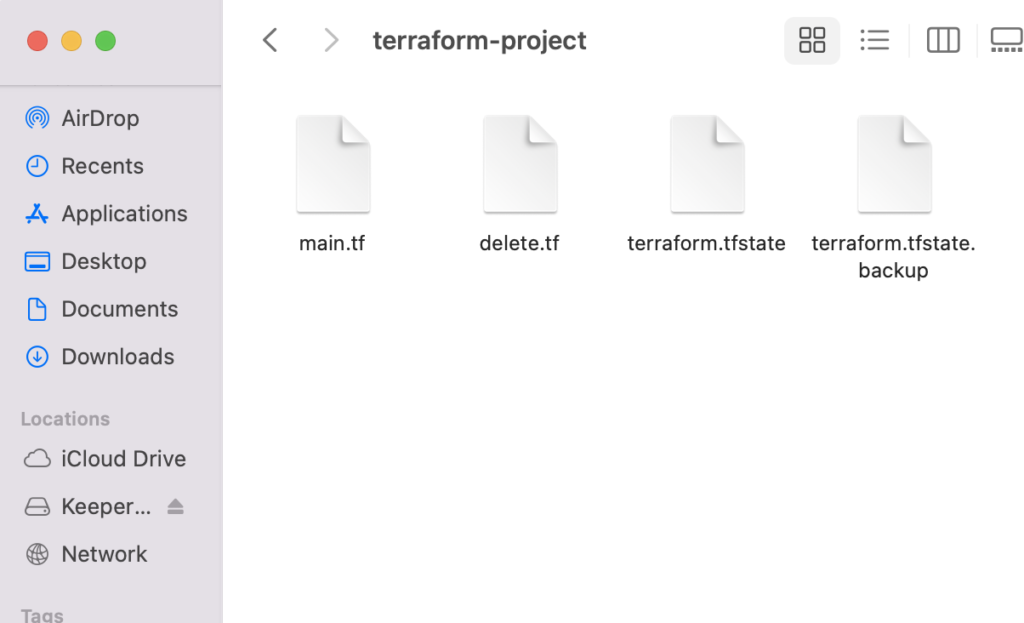
(Do pick a more meaningful name for the project folder here.)
You are almost there…
Let’s now get this thing off the ground…
#3 Initialize the project and create the .tf file
In your project’s folder, go ahead and create a new empty file called main.tf (you may use any code/text editor you wish as long as the extension is .tf — Terraform).
The first few lines you must paste come straight from the Terraform website.
Since I am using Redis Cloud, I went to the Terraform providers and clicked the “Use provider” button as below.

(For other providers, this code will look different. Here is the full provider registry at Terraform.)
Now copy the labeled code straight to your main.tf file (and save it).
Open the terminal and navigate to the path of your terraform project.
In my case, I ran the following command (it’s the same for Win/Linux).
cd /Users/igorjovanovic/Desktop/terraform-projectWhen at the folder, paste the following command to your terminal and press enter.
terraform initIf the process finishes without errors, your Terraform project is now up and running and ready to do wonders for you!
(Do you get the “command not found” error? Check this topic to add terraform to your path.)
#4 Start automating with Terraform + Redis Cloud
You’ll control the automation straight from the main.tf file that you’ve created.
Open your main.tf and add the following code chunk at the end of the file (you should already have the previous step’s code in this file).
# Get credit card details
data "rediscloud_payment_method" "card" {
    card_type = "Visa"
    last_four_numbers = "1111"
}Code language: PHP (php)
You must change Visa and 1111 to reflect your credit card added to your Redis Cloud account (click here to read how to add a payment method).
Next, you will want to instruct Terraform to create a new Redis Cloud subscription by pasting this.
# Create a subscription
resource "rediscloud_subscription" "subscription-resource" {
        name = "igor-terraform-practice"
        payment_method_id = data.rediscloud_payment_method.card.id
        memory_storage = "ram"

        # Specify the cloud provider information here
        cloud_provider {
                provider = "AWS"
                region {
                        region = "eu-west-1"
                        networking_deployment_cidr = "10.0.0.0/24"
                }
        }

        #Define the average database specification for databases in the subscription
        creation_plan {
                memory_limit_in_gb = 0.1
                quantity = 3
                replication = false
                throughput_measurement_by = "operations-per-second"
                throughput_measurement_value = 200
        }
}Code language: PHP (php)
As you can see, the code instructs Terraform to create a new subscription called igor-terraform-practice at Redis Cloud.
(Here is the official Terraform documentation for all the supported resources at Redis Cloud.)
Lastly, let’s add some database resources to our subscription. Include the following code at the end of your main.tf file.
// The primary database to provision
resource "rediscloud_subscription_database" "database-resource" {

    subscription_id = rediscloud_subscription.subscription-resource.id
    name = "database-name-igor"
    memory_limit_in_gb = 0.1
    data_persistence = "aof-every-write"
    throughput_measurement_by = "operations-per-second"
    throughput_measurement_value = 1000
    replication = false

    modules = [
        {
          name = "RedisJSON"
        }
    ]

    depends_on = [rediscloud_subscription.subscription-resource]

}

// Another DB to provision
resource "rediscloud_subscription_database" "second-database" {
    subscription_id = rediscloud_subscription.subscription-resource.id
    name = "database-name-igor-2"
    memory_limit_in_gb = 0.1
    data_persistence = "aof-every-write"
    throughput_measurement_by = "operations-per-second"
    throughput_measurement_value = 1000
    replication = false

    depends_on = [rediscloud_subscription.subscription-resource]

}
Code language: PHP (php)
In a second, we will execute the code to create two databases (database-name-igor-1 and database-name-igor-2) under the subscription called igor-terraform-practice.
Ready?
Run this code in the Terminal (from your project’s folder) to see some magic.
terraform applyTerraform will print for you the plan for the resources that will be created and you will have to press ENTER to confirm (just as in the below snapshot).
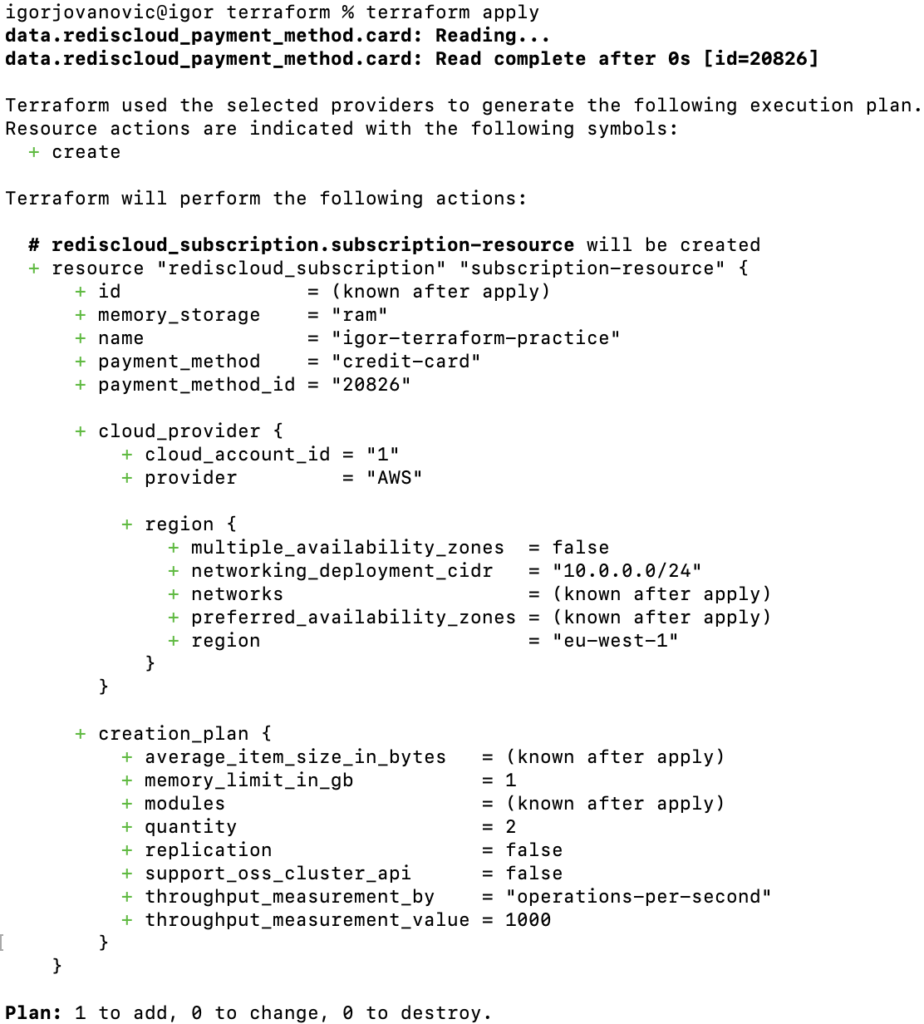
Once you hit Enter, Terraform will go ahead and start creating the resources… Here is what you will see.

Sit and relax until the creation finishes.
Terminal reports the progress on terraform apply until DBs reach the active state.
If you decide to go to your Redis Cloud Portal and log in as a user, you might already see the subscription and some “fake” databases being created and deleted.

This is not a reason to worry since Redis Cloud goes over a few intermediate states until it finally creates the resources you requested.
(This is needed to optimize the infra properly.)
After a few minutes, everything will be created just as you wanted.
That’s it — your project is off of the ground.
Let me tell you even more about how this automation actually works and what to expect while working with it.
#5 FAQs and common pitfalls
If you are a first-time user of Terraform, it’s natural to have some questions…
But first things first…
Where do you find all the possible options & params you can include in your main.tf file?
It’s Terraform Docs website itself. Click here to check the complete documentation of Redis Cloud at Terraform. (This will tell you exactly what resources you can provision and what commands you must use to do so.)
But how do you test if Terraform plans to create resources that you actually want (based on the template)?
There is a way to do a dry run by executing this command (in the project’s path).
<code>terraform plan</code>Code language: HTML, XML (xml)In a second, you will get an output of the planned resources that Terraform intends to provision (so nothing gets created).
It’s just a way for you to test if your template contains the right command for the job…
Once you are ready, you can execute terraform apply to create the resources.
Wait, how do I delete the databases or subscriptions?
This is also simple, but not before you understand the logic…
Terraform template (main.tf) is a playbook that is meant to run multiple times (and yes, it’s a good idea to version these files).
Let’s say that you’ve run the main.tf file once and have your DBs (and the subscription) up and running.
If you want to delete any of the databases, you just need to remove that db code reference from the main.tf and terraform apply.
Terraform will inform you that it’s about to delete one database.
So, what’s in the template will remain active, while what’s removed from the Terraform template will be destroyed at the next run of terraform apply.
Terraform provisions/destroys only deltas (changes) compared to already existing resources.
And how can I delete the entire subscription?
You can guess. Yes, just delete the subscription reference code from the main.tf and run terraform apply.
Do you need to create databases (and other resources) one by one?
By no means. You include all the resources in the main.tf and run terraform apply only once.
During that run, all the databases you referenced will be created.
And can you have more than one Terraform file executing at the same time (in parallel) at the same subscription?
This is not possible since the tasks can conflict when executed to the same subscription.
You must execute one Terraform template to one subscription at a time. Else, you can get this error.
403 FORBIDDEN - DATABASE_NOT_ACTIVE: Cannot update/delete a database that is not in an active stateCode language: JavaScript (javascript)But here is also a way of parallel execution (under one condition)…
You can execute multiple TF templates as long as they touch different subscriptions (do not have resources in common).
How to add more databases?
Just paste the additional code chunks at the end of your main.tf. There is no code nesting so literally paste it at the last line.
For instance, if I would need an additional database, I would paste the code below to my TF template (at the end).
// Third DB to provision
resource "rediscloud_subscription_database" "third-database" {
    subscription_id = rediscloud_subscription.subscription-resource.id
    name = "database-name-igor-3"
    memory_limit_in_gb = 0.1
    data_persistence = "aof-every-write"
    throughput_measurement_by = "operations-per-second"
    throughput_measurement_value = 1000
    replication = false

    depends_on = [rediscloud_subscription.subscription-resource]

}Code language: JavaScript (javascript)
After the task is completed, there will be a new database up and running called database-name-igor-3.
BONUS: Terraform & Redis Cloud best practices
Here are some bonus tips to make your Terraform fire on all cylinders and avoid common mistakes!
- Use version control tools like Git for Terraform configuration files to track changes and enable easy rollback.
- Use the
outputcommand in yourmain.tfto display important information or data in the terminal. Check here what you can print using this command. - Organize your Terraform code using
modules. Reusable modules make the project easily maintainable and require fewer code lines. Click to learn how to use modules. - Check existing Terraform modules in the Terraform Registry before creating new ones. (Mind module maintenance and documentation clarity.)
- Use
localsto define variables specific to a block or module. This minimal approach reduces the risk of variable name conflicts. Read about locals by clicking here. - Make use of
for_eachargument in Terraform to create multiple similar resources in a loop manner. Learn more here. - Use the
countargument to enable or disable resources based on scenarios such as infrastructure changes, variable states, or environment requirements. Read more here.
Final thoughts
We live in the era of ChatGPT & AI.
There is no room for humans to do repetitive work that can easily be automated.
Those days are gone…
But this is also an opportunity (at the same time).
In this post, I’ve shown you how to use automation to cut your deployment cycle in half (at least).
If you are using Redis Cloud, you can easily integrate it with Terraform and automate entirely all the resource provisioning and management.
(The process is very similar for other providers as well.)
Here I’ve explained the entire process, including Terraform prerequisite, installation, and basic resources provisioning (at Redis Cloud).
With the best practices, the knowledge you’ve gained here will serve you well & save a lot of time.
And remember, the sooner you jump on the automation train and apply it to your project, the better for you.
If any questions, just drop a comment!
![DNS in computer networks for mortals [Explained]](https://igorjovanovic.com/wp-content/uploads/2022/12/DNS-in-computer-networks-1024x536.png "DNS in computer networks for mortals [Explained]")

")
![Migrate ElastiCache to Redis Cloud (Enterprise) [Without Downtime]](https://igorjovanovic.com/wp-content/uploads/2023/07/Migrate-elasticache-to-redis-cloud-enterprise-1-1024x536.png "Migrate ElastiCache to Redis Cloud (Enterprise) [Without Downtime]")
")
