
Best OS For Your Servers? Here is the next part of setting up my bare metal (dedicated servers) from the ground up. Today, I’ll tell what operating system (OS) I’ve chosen and the WHY behind it.

Here are all the parts (which will be updated as I post more content):
#2 Choosing The Best Dedicated Server Configuration
#3 Best Operating System (OS) for Servers *
#4 Hosting Control Panel: Plesk Or cPanel?
After you get an email that your server is up and running, the next milestone is installing an Operating System (OS).
Note: With Hetzner (and with most other providers), your server will be immediately SSH accessible via the so-called Rescue System.
(The Rescue System is not a primary OS and should be used only temporarily and later deactivated — it’s simply a Linux layer that allows you to restore access to your server in case you lose it.)
(Break-glass in case of danger alternative…)
So, you’ll need a proper OS installed…
Options To Install OS
From here, you have two paths.
First, you can use Hetzner UI (so-called Robot) and install a selected OS with a single button click.
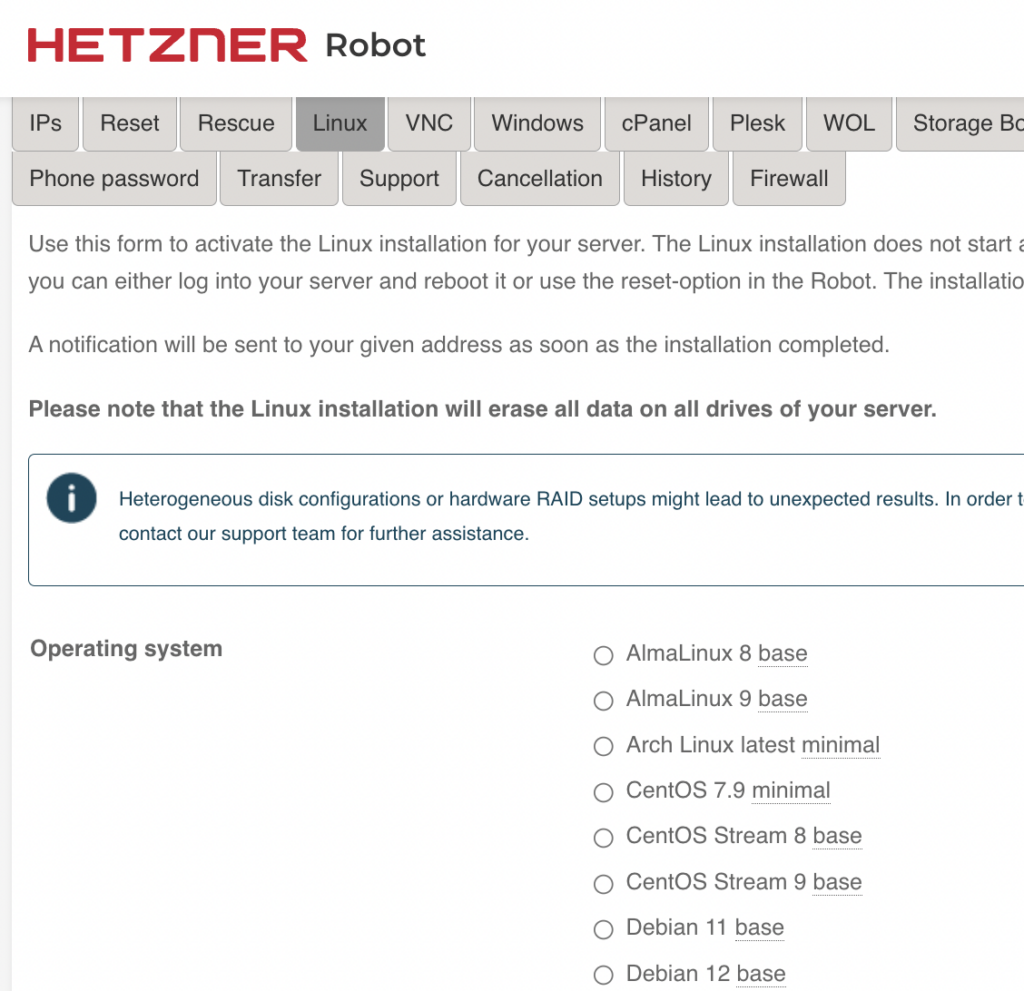
It’s an out-of-the-box functionality, so the OS gets ready very quickly —- you get an email when that happens.
But keep in mind it’s a plain-vanilla OS, meaning that you cannot add custom configurations (e.g., RAID setup of your hard drive).
Note: RAID is a process that copies your data from one to another hard drive so that your server can “survive” a single hard drive failure.
Anyway, it was important to me to set up RAID, so I went down the second path: installing OS manually from the Rescue System system (as there is much more freedom for configuration).
It’s actually easier than it sounds, and all you have to do (with Hetzner) is to run the installimage command in your SSH.
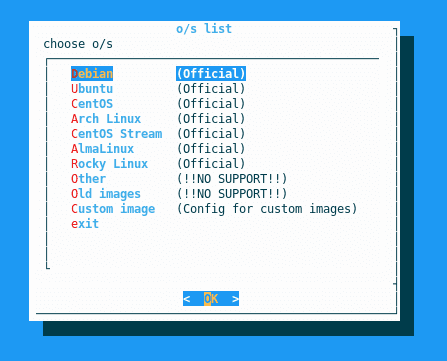
From there, you just follow the UI steps — here is the entire guide on how to install the OS manually, just in case.
But wait a minute, what OS should I choose?
Well, you are right… There are dozens of available OS options, and this can cause confusion.
Let me tell you about different alternatives (and what I’ve chosen) so that you can make the best decision.
OS Alternatives
The options are pretty much the same regardless of your dedicated server provider.
With Hetzner, here is the selection I could choose from.
- Alma Linux 8 base
- Alma Linux 9 base
- Arch Linux latest minimal
- CentOS 7.9 minimal
- CentOS Stream 8 base
- CentOS Stream 9 base
- Debian 11 base
- Debian 12 base
- Rocky Linux 8 base
- Rocky Linux 9 base
- Ubuntu 20.04.6 (HWE) LTS minimal
- Ubuntu 20.04.6 LTS base
- Ubuntu 22.04.2 LTS base
- Ubuntu 22.04.2 LTS Nextcloud
Now, should you go for Alma Linux, Arch Linux, CentOS, Debian, Rocky Linux, or Ubuntu?
Let me tell you a bit about each. (Note: each of these LINUX distributions “distros” is open-source, meaning you don’t pay anything for it.)
Alma Linux
- PROS: Compatible with Red Hat Enterprise Linux (a free version of RHEL); stable distribution and enterprise-like; growing community; intention to be supported for the long-term.
- CONS: Relatively new project, not completely mature; meant to replace CentOS but might not be 100% compatible (app changes might be needed); limited commercial support offers; smaller community; slower updates.
Arch Linux
- PROS: Easier and faster OS updates, ensuring the latest OS version; a lot of customization options, light distro; regularly maintained and neat Wiki documentation; lively community of supporters; minimalistic design focusing on performance.
- CONS: Not for beginners — steep learning curve; longer installation and somewhat harder; no official commercial support; frequent updates lead to less stable versions; you must rely on forums for support.
CentOS Linux
- PROS: Enterprise-like and based on and compatible with RHEL; known for stability and enterprise grades; embeds RHEL security features; long-term support for releases; huge community and wide support; easy installation of customizations.
- CONS: based on stable releases, so slower updates and missing latest features; shift to CentOS Stream, which is meant to fix this and update more frequently; CentOS 7 and 8 will be discontinued since RedHet is stopping the CentOS Linux initiative; Read here about CentOS Linux vs CentOS Stream (CentOS is dead).
Debian
- PROS: Very stable; a long-running project with many packages and customizations available; supports a wide range of hardware; focuses on security; large and active community; different editions available.
- CONS: Slower release cycles and the possibility of missing the latest features; sometimes outdated user experience; less user-friendly installer; some packages are commercial; lack commercial-grade support.
Rocky Linux
- PROS: RHEL compatible and enterprise-grade; similar to CentOS, focus on stable releases of RHEL; security inherited from RHEL; long-term support available; growing community support.
- CONS: relatively new; requires application changes when switching to Rocky Linux (e.g., from CentOS); commercial support is not completely mature; you must rely on the community for support.
Ubuntu
- PROS: Focus on user-friendliness; good for beginners but also for experts; highly customizable, excellent out-of-the-box support packages; strong community support; high predictability of the (long-term) releases; provides desktop support (GUI) out of the box; native for the cloud.
- CONS: Snap packages raised some security concerns; contains some non-open-source packages by default; the desktop environment is resource heavy; not customizable as other distros; there is some overhead compared to more minimalistic options.
My Choice: Ubuntu
Over the years, I used CentOS (the old servers ran on CentOS 7).
Why is it so?
Well, the best enterprise-grade Linux you can get is Red Hat Enterprise Linux (RHEL).
But RHEL is not an open-source software, and you have to pay for it.
So, CentOS appeared as a “middle-way” as it is an open-source copy of RHEL containing many RHEL security features.
So what’s the problem now?
Red Hat (the company behind RHEL and CentOS) decided to discontinue CentOS Linux, which means CentOS will not exist in its present form.
(There is the so-called CentOS Stream, which is meant more for testing, and it’s not a full-blown OS like CentOS Linux.)
(This is understandable from Red Had since they want to sell more of RHEL, and CentOS Linux has become a big competitor to their paid product…)
So, I thought it was the right moment to move out of CentOS to a more future-proof solution.
Read here a comparison between CentOS and Ubuntu.
All options considered, I selected Ubuntu as it had all I needed.
It’s relatively easy to install and maintain, and its security features are very solid.
Tip: always use the latest OS available with Long Term Support (LTS) — just as I did by selecting Ubuntu 22.04.3 LTS.
Configure RAID And Install OS
Remember I told you earlier to use the manual OS installation process if you want to implement custom features?
Since my server has two HDDs (hard drives), I decided to implement a disc failure recovery mechanism.
It’s relatively simple to understand. One hard drive will be used for data storage while the other is a mere copy of it (so-called RAID Level 1 – mirroring).
The orchestration is completely done by the software and the “switch” in case one of the hard drives fails.
This is how you achieve high availability of hard drives since the server will keep serving traffic even if one hard drive goes bust.
The downside is that you can’t use the capacity of both drives for data (as two drives hold identical sets).
To implement RAID, you must install the OS yourself (just as I did).
Note: After you start the OS installation, the UI will guide you through partitioning of your hard drives, as this is a requirement before you can configure the RAID level.
Tip: Make one hard drive reserved for OS only (read this discussion).
Tip 2: Another interesting debate about partitioning a dedicated server.
Further down the installation path, you will see a configuration file where you select the RAID level and map the hard drives that you want to include.
Just scroll down the file and read the comments carefully, as these provide examples of how you configure RAID.
In my case, I selected RAID 1 (mirroring) and then simply listed all the hard drives I created in the initial step (just follow the template in the config file itself).
Now, it’s time to start the OS installation by clicking Next.
Keep this guide handy to check the status of the sync after RAID has been setup.
First Boot
The next step is to finally let the installer do its thing…
In approximately 5-10 minutes, the OS will be ready for use.
(Note: in Hetzner, you have to reboot the server so that it starts with the newly installed OS rather than in the Rescue Mode.)
There are a few things I did immediately after I SSH-ed into the newly installed OS.
First, I checked if there were no disc-related issues (as this is an auction server that was already in use earlier).
sudo apt install smartmontools
sudo smartctl -a /dev/sda
And, as expected, there were 0 issues found on hard drives…
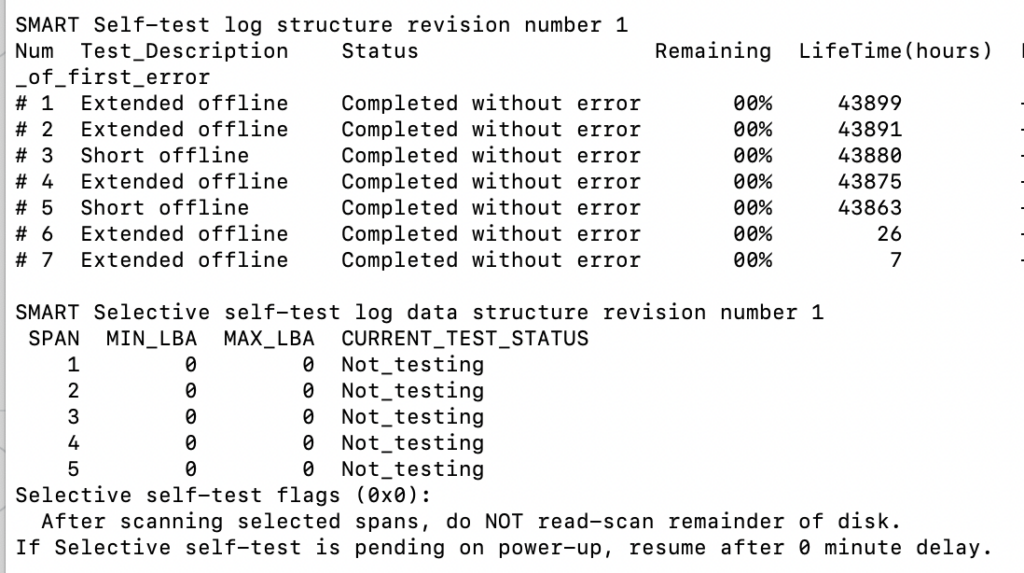
The status “Completed without error” tells you that the hard drives are healthy and ready to cross additional mileage serving you…
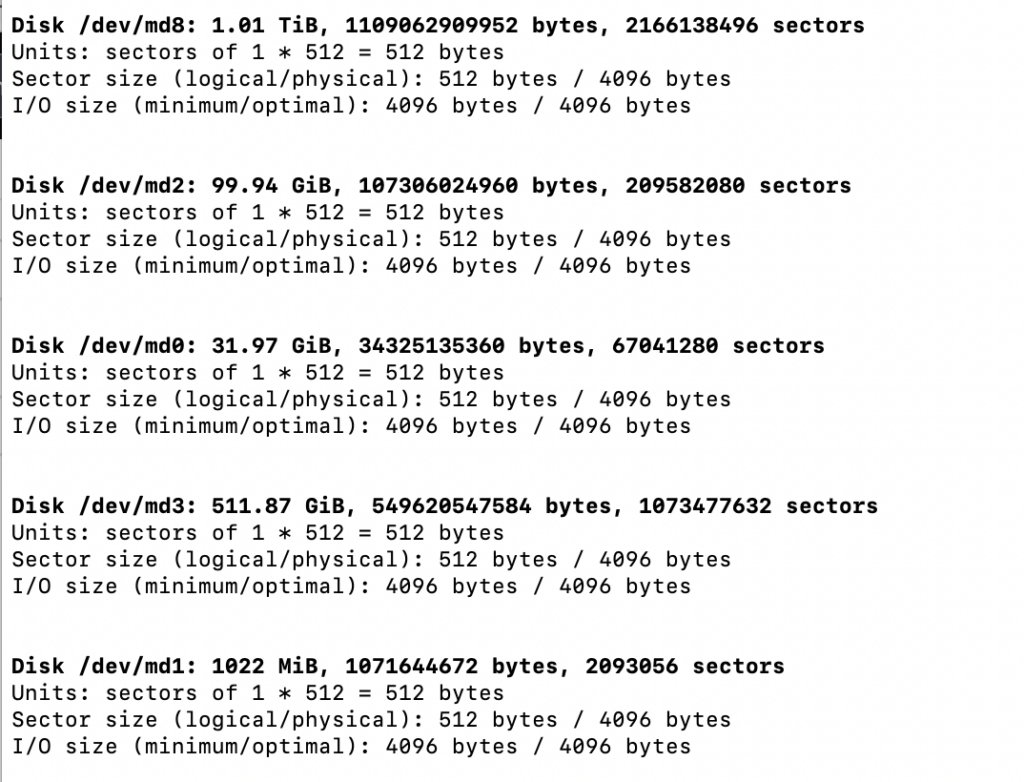
The second check is the status of the RAID devices (the sync status).
sudo apt install fdisk
fdisk -l
If all goes fine, you should see a similar output to this.
So, at this point, I have my dedicated server up and running on Ubuntu 22.04.3 LTS. (Plus, RAID-1 in order and syncing.)
In the next post, I will tell you everything about setting up a website manager and possible options: Cpanel/Plesk.
![DNS in computer networks for mortals [Explained]](https://igorjovanovic.com/wp-content/uploads/2022/12/DNS-in-computer-networks-1024x536.png "DNS in computer networks for mortals [Explained]")


")
